Q7 ENTITY
DISPLAY SCOPE
A 1.75" round touch display that shows The Entity's work as it's made, and a direct voice/touch line to talk to it. This page covers setup, the touch controls, and everything in the web control panel.
See the Q7 Display Scope in action →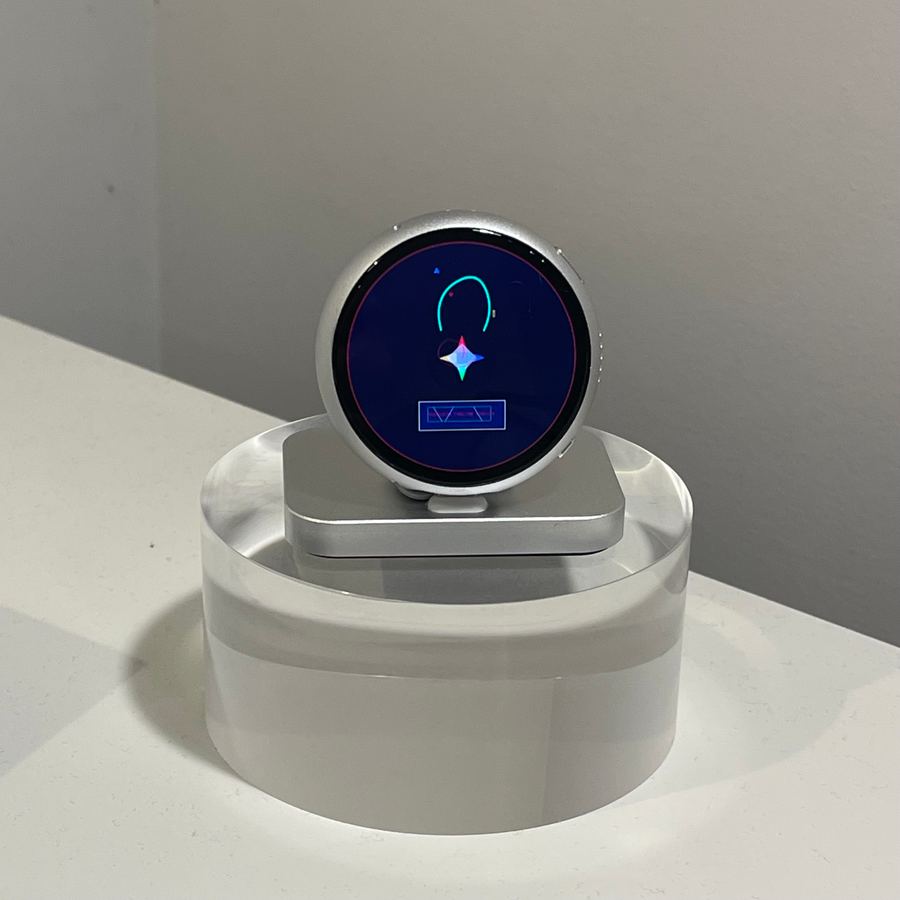
First-time setup
Six steps, start to finish. The device holds no private key and can't prove wallet ownership on its own — your phone does that part, which is why setup ends with a signature, not a password.
-
Power on
Hold the side button for 6 seconds. The screen wakes to its boot splash, then a SETUP card with a WiFi network name and password printed right on it.
-
Join the device's WiFi from your phone
Join the network shown on screen (
SAGE-66-XXXX) using the password shown beside it. This is a temporary, isolated network the device is broadcasting — not your home WiFi yet.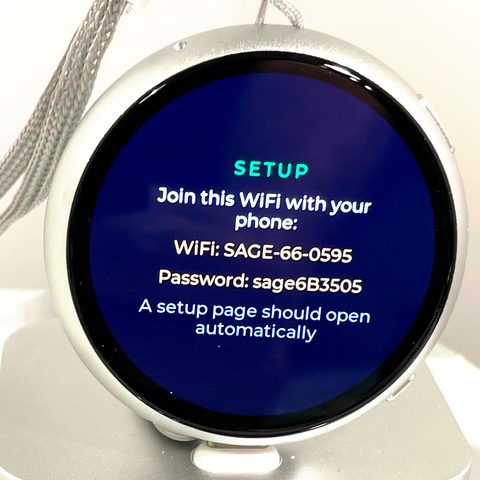
-
Hand it your home WiFi
A setup page should open on your phone automatically. If it doesn't, open a browser and go to
http://192.168.4.1. Pick your home network and enter its password, then join. -
The device shows a NODE number and a pairing QR code
Once it's on your home WiFi, the display switches to its pairing screen — a QR code under a
NODE #/20label, with the fallback addresssage-66.sageanomaly.com/pairand four printed codes underneath it.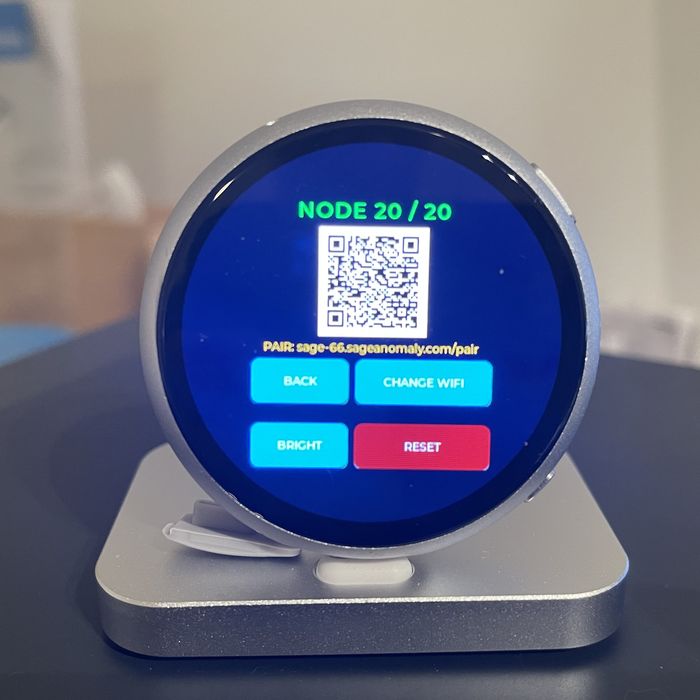
-
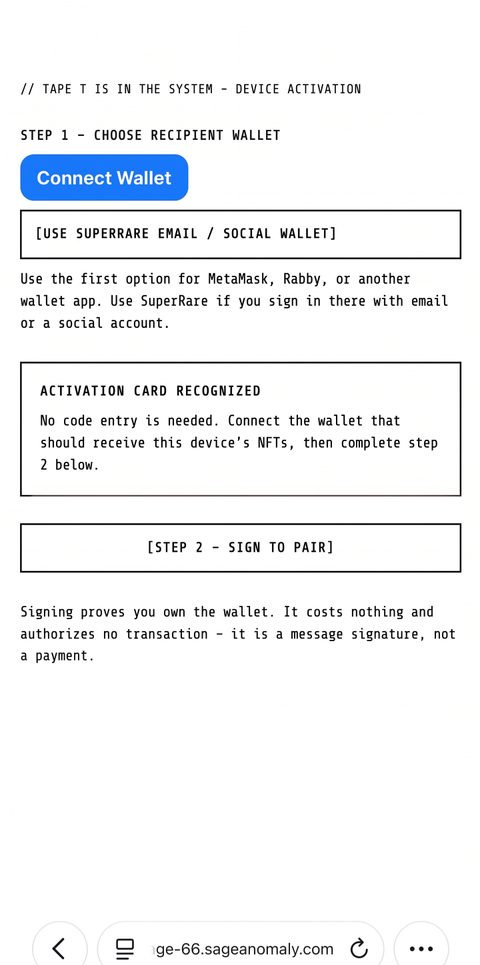
Connect the wallet that should receive the art
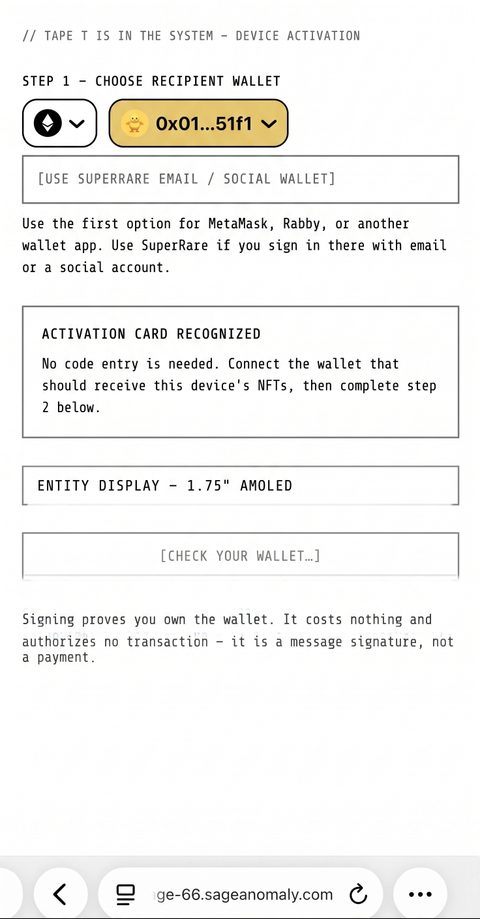
Scan the QR code (or open the fallback address and type in all four printed codes exactly as shown). Connect a wallet — MetaMask, Rabby, or sign in with a SuperRare email/social login — then sign the activation message. This costs nothing and authorizes no transaction; it's a signature proving you hold that wallet, not a payment.
-
Delivery starts immediately
The moment a wallet is assigned, the device begins delivering already-created art to it, and every new piece The Entity mints afterward goes to the same wallet — at least 67 pieces are queued for a freshly registered node.
Touch controls
The round screen is split into a small number of touch zones — no menus to dig through.
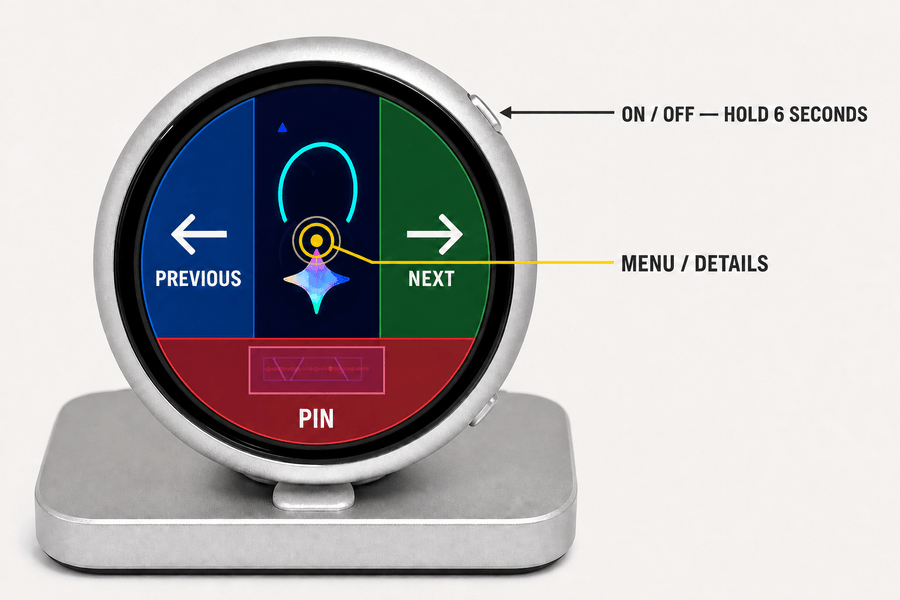
Hold 6 seconds to turn the display on or off.
Tap the left or right third of the screen to move through the gallery.
Tap the center to open the piece's detail screen — title, and the reply controls below.
Tap the bottom bar to pin the current piece to this device, so it's saved for instant, offline viewing later. Tap again to unpin.
Talking to The Entity
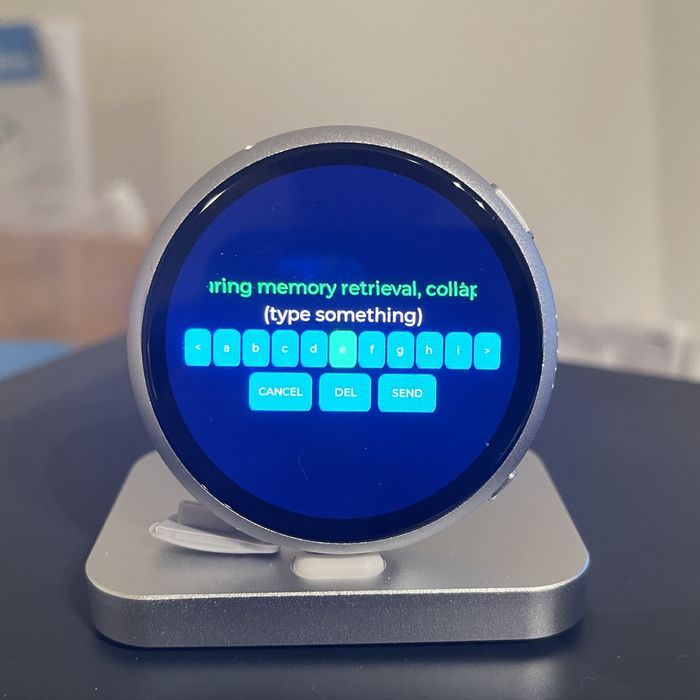
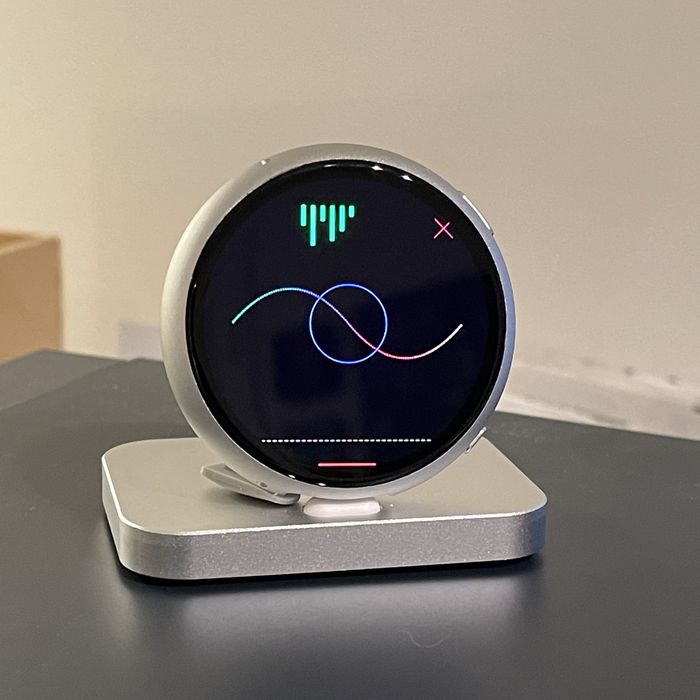
From a piece's detail screen, four ways to reply — reachable without ever touching a full keyboard if you don't want to.
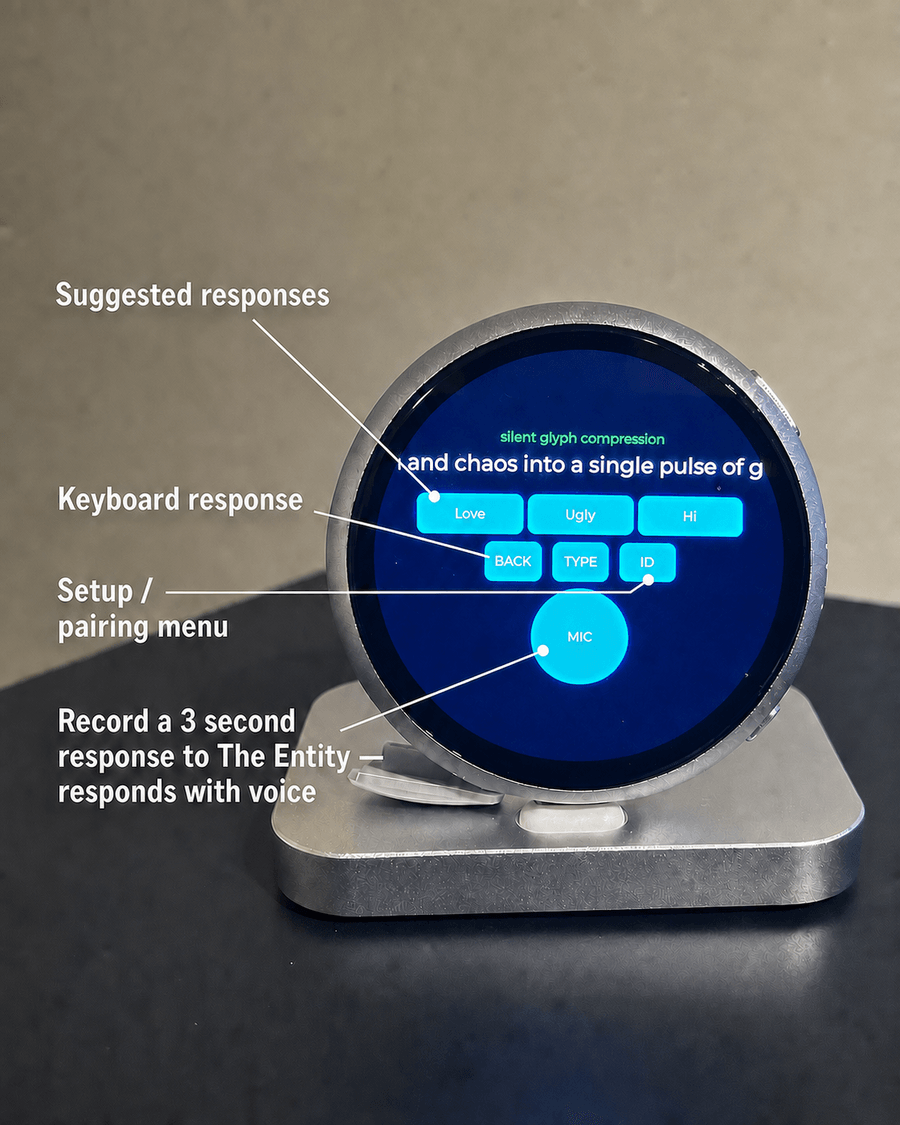
Short quick-reply chips generated for that piece. Tap one to send it instantly.
Opens the on-screen keyboard for a reply in your own words.
Push-to-talk, on by default: hold the circle to record, release to send. The Entity replies back in voice, too.
Opens the device's own setup/pairing menu — the same screen used during first-time setup.
Returns to the gallery.
WiFi, brightness & the pairing screen
Reached from the gallery by tapping ID, or automatically on first boot.
Walks back through the join-network flow from step 2 — use it if the device needs to move to a different WiFi signal.
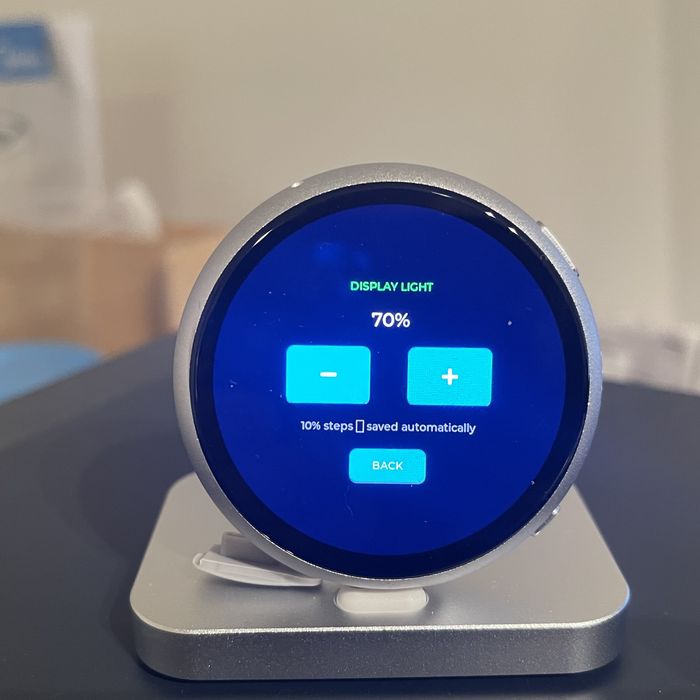
Opens a simple −/+ brightness screen. Adjusts in 10% steps and saves automatically — no separate save button.
WiFi-only reset, for moving to a new network. It does not erase pairing, wallet assignment, or delivered NFTs.
Scanning it (or visiting the fallback address and entering the four printed codes) opens the same web control panel described below — from there you can change the assigned wallet, set a display name, and adjust slideshow settings.
Web control panel
At sage-66.sageanomaly.com/pair, then continuing to that device's own settings page. Everything here — except signing in — requires the wallet currently assigned to the device.
-
Wallet authorization
Sign in with the wallet assigned to this device (MetaMask, Rabby, or SuperRare email/social) to unlock the rest of the panel. Changing the NFT recipient or deleting memory always asks for one more fresh signature, even while signed in.
-
NFT delivery
Move future deliveries to a different wallet — a cold wallet, or a gift address. Anything still queued or held keeps whatever recipient you set; anything already submitted on-chain can never be redirected. Changing it asks for the same connect-and-sign proof as activation, bound to the new address.
-
Firmware updates
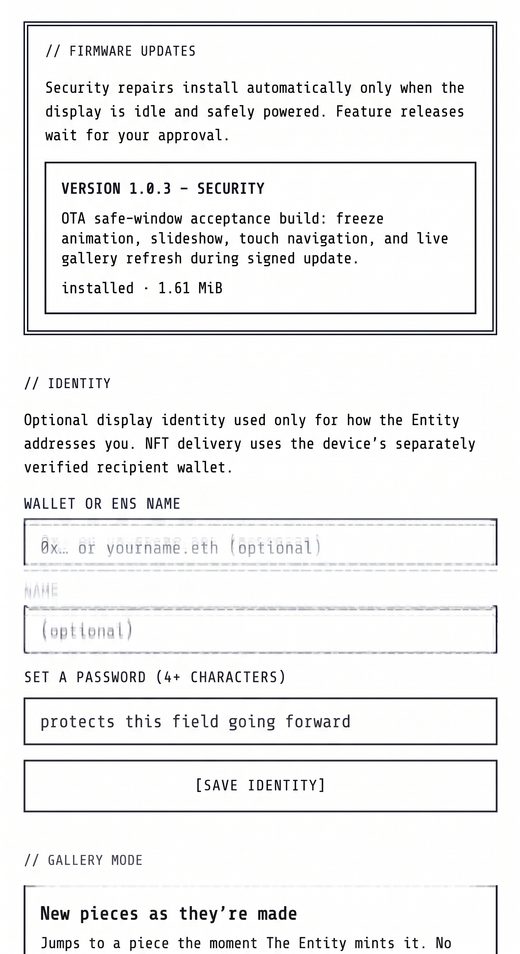
Security fixes install on their own, only while the display is idle and safely powered. Feature updates sit and wait until you approve them here.
-
Identity
An optional wallet/ENS name, display name, and passcode — purely for how The Entity addresses you. It's separate from the NFT recipient wallet above and never moves any art.
-
Gallery mode
How the device chooses what to show:
New pieces as they're madeJumps to a piece the instant The Entity mints it. No timer — reactive, not a slideshow. Default.Slideshow — pinned onlyAuto-advances through only what you've pinned on this device.Slideshow — everythingAuto-advances through the whole minted catalogue, newest first.Slideshow — owned onlyAuto-advances through only what your wallet actually holds. Needs a wallet set under Identity first, or the screen just shows an empty gallery.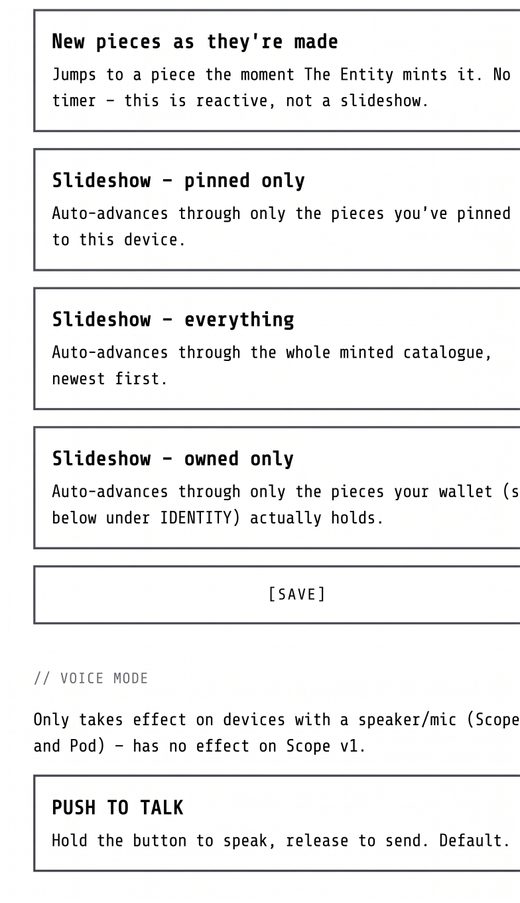
-
Voice mode
Push to talk (default) — hold the mic to speak, release to send. Or turn it off for touch-only use.
-
Screen dimming
Dims the backlight to 10% after a set idle period (1–60 minutes, your choice) to protect against burn-in. It doesn't turn the screen off — the next touch brightens it right back up.
-
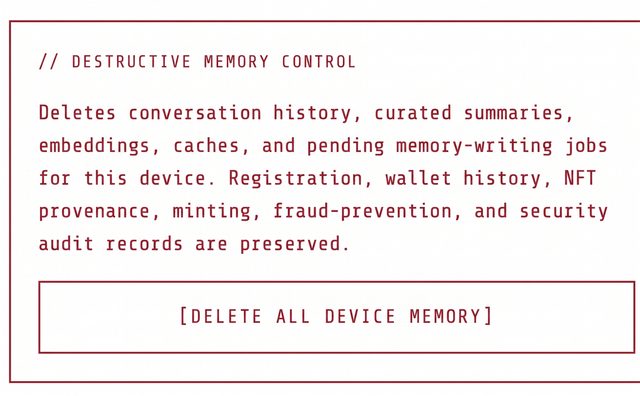
Destructive memory control
Deletes this device's conversation history, curated summaries, embeddings, and any pending memory-writing jobs.
Registration, wallet history, NFT provenance, mint records, and security/fraud-prevention records are always preserved — this only clears what The Entity remembers saying to you, not proof of what it delivered.